Prepping and Priming Walls for a Flawless Paint Job: A Redmond Remodeling Guide

When it comes to Redmond remodeling, a fresh coat of paint is one of the most transformative upgrades you can make to your home. Whether you’re redoing a single room or tackling a full-scale custom home improvement, painting is a crucial part of making your space feel new and refreshed. However, achieving that flawless, professional-grade finish requires more than just picking the right color and brush. The real secret lies in the prep work—especially prepping and priming your walls before you paint.
We all know the frustration of seeing paint chip, peel, or fail to look as smooth as we imagined. That’s why we need to take the proper steps before getting into the actual painting. In this guide, we’ll walk you through the essential steps to ensure your walls are ready for that perfect paint job. From assessing wall damage to choosing the right primer, these steps are a key part of any home renovation checklist. Whether you’re tackling the job yourself or hiring a home remodeling architect or contractors for home renovation, the quality of your results will depend on this foundational work.
Let’s dive into the process step-by-step and discover how prepping and priming can help you achieve that flawless, long-lasting finish you’ve been dreaming about.

Importance of a Smooth Paint Job in Home Renovations

The paint in your home sets the mood for your entire space. A smooth, flawless paint job can instantly uplift a room, while a poorly done one can ruin even the best-planned design. This is especially important in Redmond remodeling projects where your goal is not just to refresh a space, but to create an entirely new feel.
Prepping and priming walls are vital steps for any quality home improvement because they ensure the paint will adhere properly and look its best. Skipping these steps can result in peeling, uneven texture, and a paint job that wears out quickly—leaving you to redo the project sooner than you’d like. By taking the time to do the prep work right, you’re guaranteeing that your reliable home improvement efforts stand the test of time.
Whether you’re working with a home improvement specialist or taking on a DIY painting project, following the right steps for prep and prime can make all the difference. Let’s explore the steps in detail, starting with assessing your walls.

Step 1: Assessing Your Walls for Damage

Before you can even think about applying primer or paint, it’s crucial to inspect your walls for any damage. Redmond’s weather—particularly its wet winters—can lead to wall damage that you may not immediately notice.
First, look for cracks, dents, and holes in your walls. These can easily compromise the appearance of your final paint job. Tiny cracks may seem harmless, but once you paint over them, they can still show through, and over time, they may worsen, making your fresh paint look old and worn.
Another major factor to consider is moisture damage, which can be common in Redmond remodeling projects. Excess moisture, especially from past leaks or humidity, can cause mold growth or peeling paint. A home improvement specialist will tell you that moisture can ruin not only your paint job but also the walls themselves.
Moisture can weaken drywall and other materials, leading to more extensive repairs if not addressed. As part of your home renovation checklist, make sure you inspect walls thoroughly and repair any issues with cracks or moisture before moving on to the next step.

Step 2: Cleaning and Sanding Walls

Once you’ve identified and repaired any damage, it’s time to clean your walls. A common mistake people make is thinking they can paint directly over dirty or dusty walls. Even if your walls don’t appear to be grimy, there’s likely a thin layer of dust, oils, or grime that will interfere with the paint’s ability to adhere properly.
In a custom home improvement project, cleanliness is critical. Dust particles or grease spots can cause bubbles or uneven patches once you start painting. To ensure the paint goes on smoothly, scrub your walls with a mild detergent solution. Let the walls dry completely before moving to the next step.
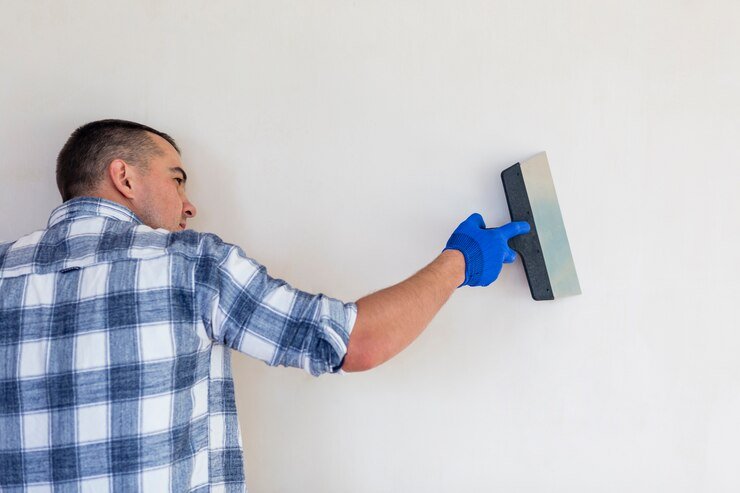
Sanding is equally important. After cleaning, lightly sand the surface to create an even texture. Sanding smooths out any imperfections or rough areas that could be visible under a fresh coat of paint. Pay special attention to areas you’ve patched up—these spots need to blend seamlessly with the rest of the wall. Proper sanding is a key part of achieving that smooth, professional finish in Redmond remodeling projects.

Ready For A Project?

Cast Your Impression With A Design

Ready to transform your space with NW Expert Builders? Whether you’re planning a residential renovation, commercial construction, or interior design project, we’re here to bring your vision to life.

Step 3: Choosing the Right Primer

Once your walls are clean and smooth, it’s time to think about the primer. Many homeowners skip this step, but in quality home improvement, primer is essential for achieving a smooth, even paint job.
Primer serves several important purposes. It seals the wall, blocks stains, and provides a uniform surface for the paint to adhere to. When choosing a primer, consider the material of your walls. For instance, drywall requires a different type of primer than plaster or wood.
If you have drywall, use a water-based primer that can seal and prepare the surface for painting. For plaster walls, an oil-based or shellac primer works better to cover the surface and provide a smooth finish. If you’re working with wood paneling, you’ll want a stain-blocking primer to prevent any wood knots or stains from bleeding through the paint. Home remodeling architects and professional contractors for home renovation will always emphasize that the right primer is key to long-lasting results.
For homes in Redmond, where moisture can be an issue, it’s especially important to choose a primer designed to withstand humidity. Mold and mildew-resistant primers are a smart choice for homes in this region. This step helps ensure your reliable home improvement efforts will stand the test of time, even in damp conditions.

Step 4: Proper Priming Techniques for Redmond Homes

Now that you’ve chosen the right primer, it’s time to apply it correctly. Even if you’re using the best primer available, improper application can lead to uneven results.
First, ensure the room has proper ventilation, especially in a Redmond remodeling project where dampness can be a concern. Humidity can cause primer to dry too slowly or unevenly. Use long, even strokes when applying the primer, and avoid oversaturating your roller or brush. Applying too much primer can lead to drips, which will be visible even after you paint.
A good rule of thumb is to apply one coat of primer and allow it to dry completely. Drying times can vary depending on the type of primer you use, but it’s typically best to wait at least 24 hours before applying paint. This ensures the primer has fully cured and won’t mix with the paint, causing streaks or patches. As part of your home renovation checklist, make sure to factor in enough drying time.

Step 5: Painting Tips for a Perfect Finish

Now that your walls are prepped and primed, it’s time for the fun part—painting! But don’t rush; there are still a few key tips to ensure your paint job turns out perfectly.
First, invest in high-quality paint and tools. Cheap paint often requires more coats, and budget brushes can leave streaks. In a quality home improvement project, the goal is to achieve a smooth, even finish with as few coats as possible. Higher-end paints are more pigmented, allowing for better coverage and durability.
Use a combination of rollers and brushes to reach all areas of the wall. Rollers work best for larger, flat areas, while brushes are better for corners and edges. Keep in mind that applying two thin coats of paint will yield a better result than one thick coat. A home improvement specialist will always recommend this technique to avoid drips and ensure even coverage.
If you’re feeling unsure about achieving that professional finish, don’t hesitate to consult with contractors for home renovation. They have the skills and experience to give you the flawless result you’re after.

Conclusion

Prepping and priming are essential steps for ensuring a flawless and long-lasting paint job. In any Redmond remodeling project, proper preparation is the foundation for success. Whether you’re painting a single room or undergoing a full custom home improvement, following these steps will guarantee professional-level results.
From assessing wall damage to choosing the right primer and applying paint with care, these steps will keep your walls looking fresh for years to come. If you need help, NW Expert Builders is here to assist with your home renovation checklist. Our team of home remodeling architects and skilled professionals is ready to tackle all your painting and reliable home improvement needs.

Frequently Asked Questions

Yes, primer helps the paint adhere better and provides a smoother finish. Skipping primer can lead to uneven results, especially in older homes with patched walls or stains.

Look for signs like peeling paint, discoloration, or a musty smell. In Redmond remodeling, moisture issues are common, so it's important to address them before painting.

For high-traffic areas, opt for durable, washable paint like semi-gloss or satin. These finishes hold up well to cleaning and wear and tear.

It’s best to wait at least 4 hours between coats or follow the manufacturer’s recommendations. This ensures the first coat has dried properly.

Yes, sanding helps create a smooth surface for the primer to adhere to. Even if your walls look smooth, light sanding ensures an even texture.

Use a mild detergent and warm water to remove dust, dirt, and oils. Let the walls dry completely before moving on to priming.

Use high-quality brushes and paint, and apply thin coats. Brush strokes can also be minimized by using a paint conditioner.

Choose a primer based on the surface material. Drywall, plaster, and wood all require different types of primers for the best results.

Tags :

Leave a Reply

Your email address will not be published. Required fields are marked *

Picture of Written by: Rocken
Written by: Rocken

Natoque viverra porttitor volutpat penatibus himenaeos. Vehicula commodo si hendrerit.

Latest Post

Categories

The designs you will crave for

Lorem ipsum dolor sit amet consectetur.